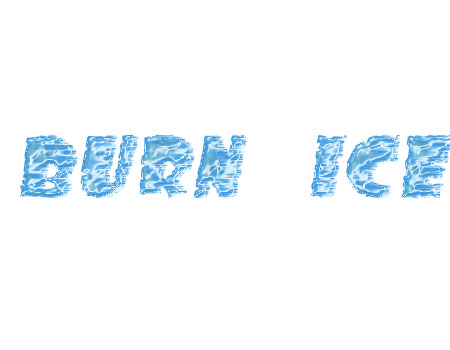
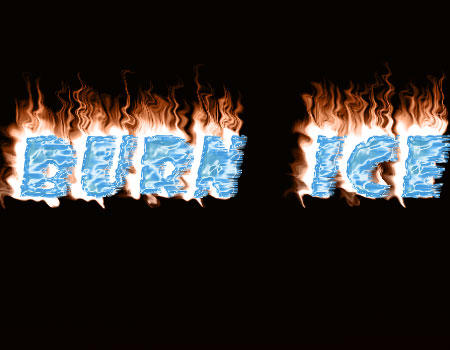
Burn Ice

0
0
(0)

Burn Ice

Bước 1.
Tạo 1 file mới 450X350 pixels và đặt tên là “ICE” . Sử dụng Horizontal Type Tool và viết ice text,  VD: BURN ICE, với "DS SonOf" type và 85 pt và tô màu cho nó.

Bước 2.
Vào Layer > Layer Styles > Blending Options  với các  thiết lập như sau:

Stroke (color-> #6fbdf3)

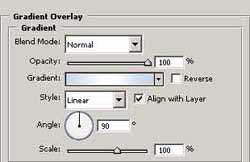
Gradient Overlay (color-> #c8dbea)

Color Overlay (color-> #9ad6df)

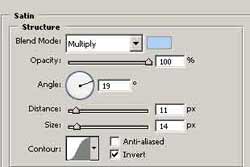
Satin (color-> #a6d5f5)

Bevel and Emboss (color-> #76c0de)
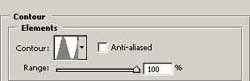
Contour

Texture


Bước 3. 
Vào Filter > Stylize > Wind  với các  thiết lập như sau: Method-> Wind,Direction -> From the Right.

Bước  4.
Tạo layer mới đặt tên là "Burn" with the same text with dark grey background for the burn text. Remove BURN text a little left from the Ice text.


Bước 5.
Ấn Filter > Stylize > Wind  với các thiết lập : Method-> WindDirection -> From the Right. Rồi vào Edit > Transform > Rotate 90 CCW. Ấn Filter -> Stylize -> Wind lần 2 với thiết lập : Method -> WindDirection -> From the Right. Rồi ấn  Edit > Transform > Rotate 90 CW. Sao ra 1 layer nữa .

Bước  6.
Tới  "Burn copy" layer và ấn Filter > Distort > Ripple với thiết lập : Amount -> -258Size -> Medium và nhấn tổ hợp phím Ctrl+E để kết hợp với layer "Burn".

Bước 7.
Sử dụng  Reflected Gradient Tool với màu cam xám và màu đen  (1/1) và chạy across  screen của bạn cho tới khi được màu ưng ý . Cố định cách pha trộn màu cho layer.

Bước 8.
Quay layers với ice và burn texts và bạn nhận được burn ice, nhưng để được kết quả tốt ta nên thay đổi màu nền là màu đen. Và bạn có thể sáng tạo ra một vài kiểu bạn thích.


How useful was this post?

Click on a star to rate it!

Average rating 0 / 5. Vote count: 0

No votes so far! Be the first to rate this post.

Leave A Reply

Your email address will not be published.